Table of Contents
How to Create and Delete Email Accounts in cPanel

In cPanel, managing email accounts is an essential task for cpanel hosting services. Here’s a step-by-step guide on how to create and delete email accounts in cPanel:
1. How to Create an Email Account in cPanel
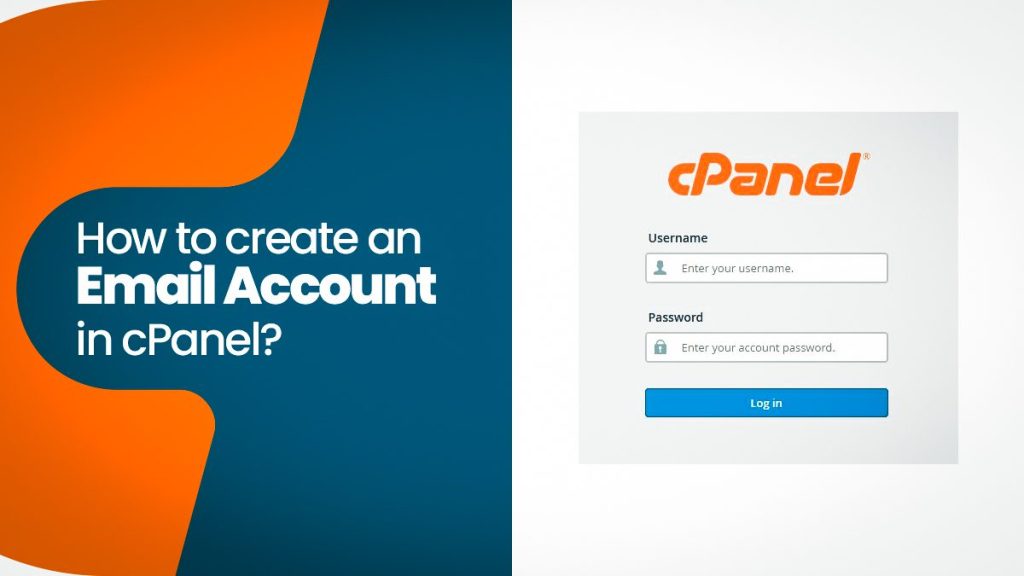
Step 1: Log in to cPanel
- Open your web browser and go to your cPanel login URL (usually something like
https://yourdomain.com/cpanel). - Enter your cPanel username and password to log in.
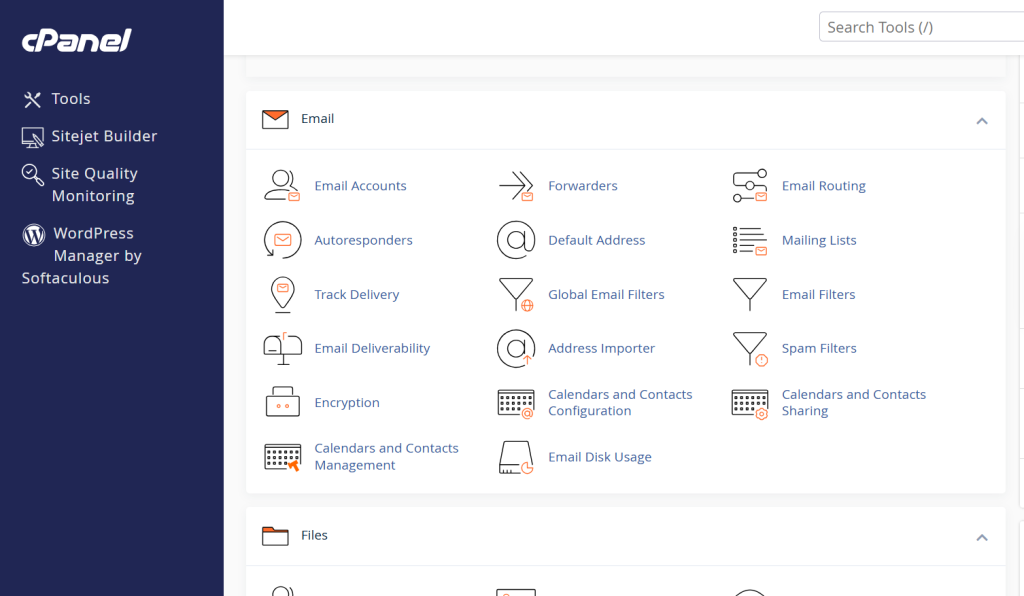
Step 2: Navigate to the “Email Accounts” Section
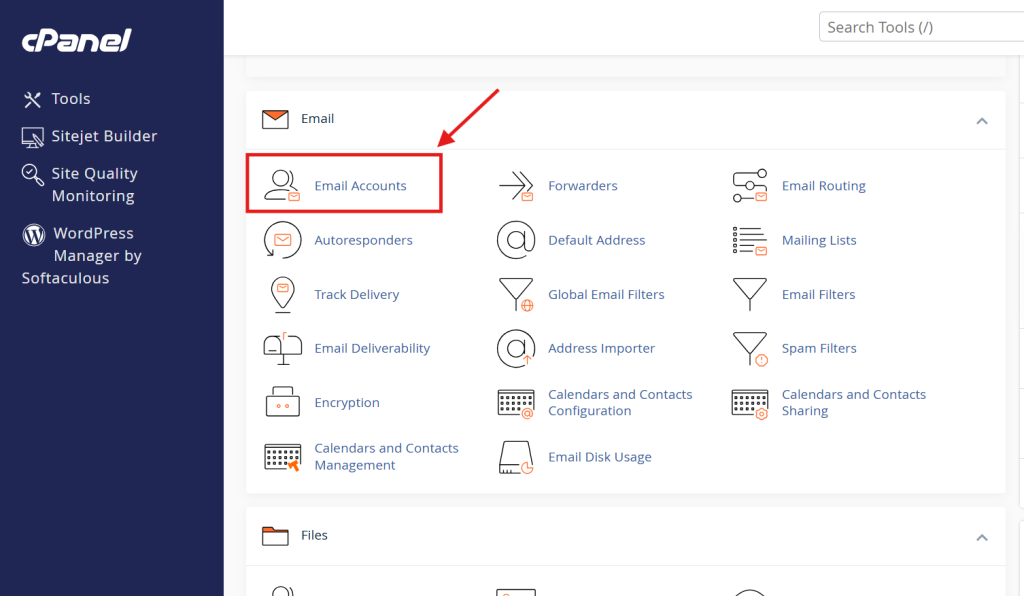
- Once logged in, find the “Email” section.
- Click on “Email Accounts”.
Step 3: Create a New Email Account

- On the Email Account page, click the “Create” button to begin setting up a new email account.
- Fill in the details for the new email account:
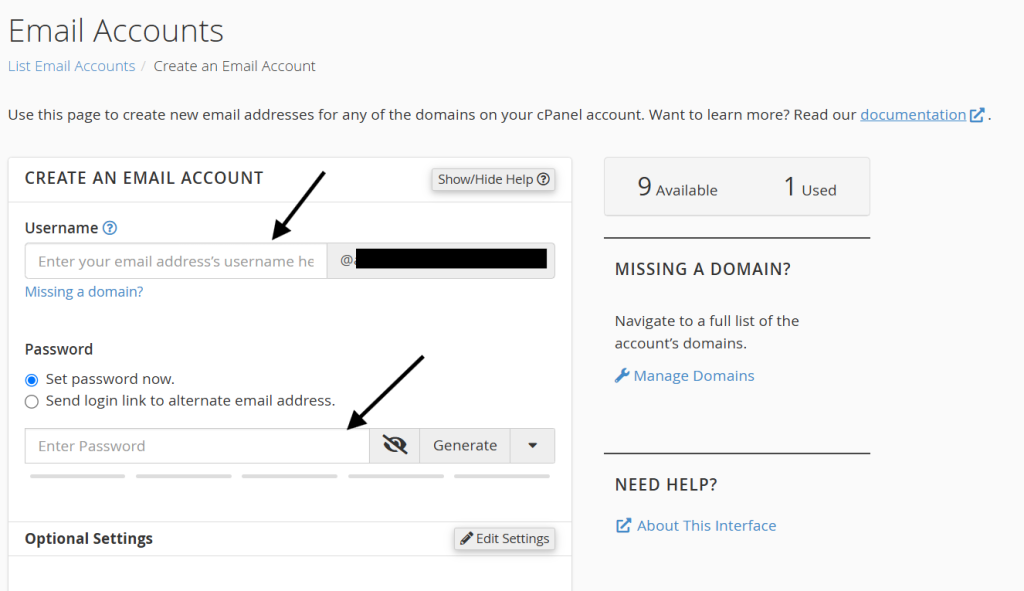
- Domain: Choose the domain for which you want to create the email (if you have multiple domains).
- Username: Enter the name of the email account (e.g., “info”, “support”, etc.).
- Password: Enter a secure password, or you can use the Password Generator to create one.
- Storage Space: Set a mailbox quota or leave it as “Unlimited” (depends on your hosting plan).
Step 4: Create the Account
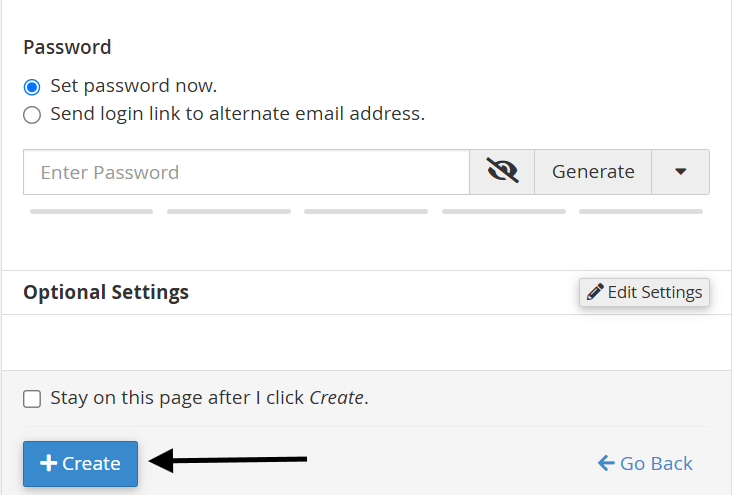
- After filling in the details, click “Create” to finalize the creation of the email account.
Step 5: Access the New Email Account
- Once the email account is created, it will appear on the Email Accounts page. You can now use webmail, configure email clients, or access the account via an email application.
2. How to Delete an Email Account in cPanel
Step 1: Log in to cPanel

- As with creating an email account, start by logging into cPanel using your username and password.
Step 2: Navigate to the “Email Accounts” Section

- In the cPanel dashboard, find the “Email” section.
- Click on “Email Accounts”.
Step 3: Delete the Email Account
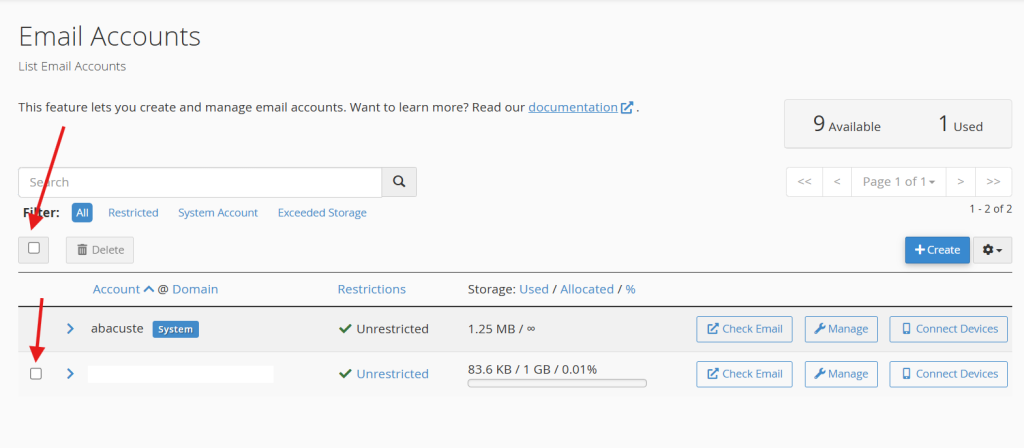
- On the Email Accounts page, you will see a list of all the email accounts created under your domain.
- Locate the email account you want to delete.
- Click on the “Delete” link next to the account.
Step 4: Confirm Deletion
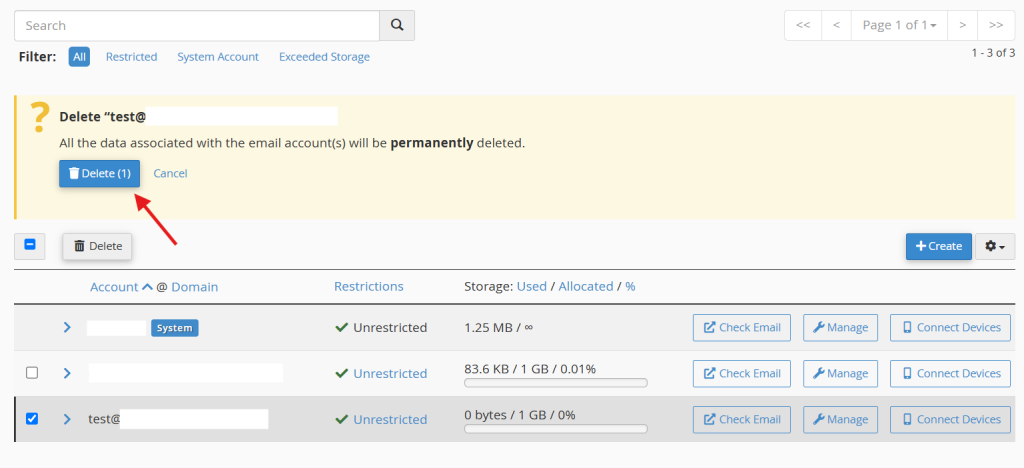
- You will be prompted to confirm the deletion.
- Confirm by clicking “Delete Account” again.
Step 5: Account Deletion
- The email account will be removed from the list, and its associated data (including emails) will be deleted permanently, so be sure to back up any important information before deleting.
Important Notes:
- Backup Emails: Before deleting an email account, consider backing up any important emails since deleting an account removes all data associated with it.
- Email Forwarders: If you have set up email forwarders for the account, make sure to review and remove those before deleting the account.
- IMAP/POP Settings: Once an email account is deleted, it can no longer be accessed via IMAP/POP or any email client, so ensure the necessary data is saved.
By following these steps, you can easily manage email accounts in c Panel, whether you are creating new accounts or deleting old ones.
In c Panel, the Email accounts feature is used to manage email accounts. This tool allows you to create, delete, and manage email addresses associated with your domain.
Here are the primary functions it provides:
- Create Email Accounts: You can create new email accounts with custom email addresses (e.g., user@yourdomain.com).
- Manage Email Settings: You can set mailbox quotas, configure auto-responders, and access settings like spam filters.
- Password Management: Change the password for existing email accounts.
- Email Forwarders: Set up email forwarding so that emails sent to one address are automatically redirected to another.
- Email Filters: Create and manage filters for incoming emails (e.g., move specific emails to folders based on criteria).
- Access Webmail: You can access your email through c Panel’s Webmail interface or configure your email client (e.g., Outlook, Thunderbird) using the settings provided.
To access this feature, log in to your c Panel account and locate the Email Account section.